How to Take the Best
Photos of Niagara Falls
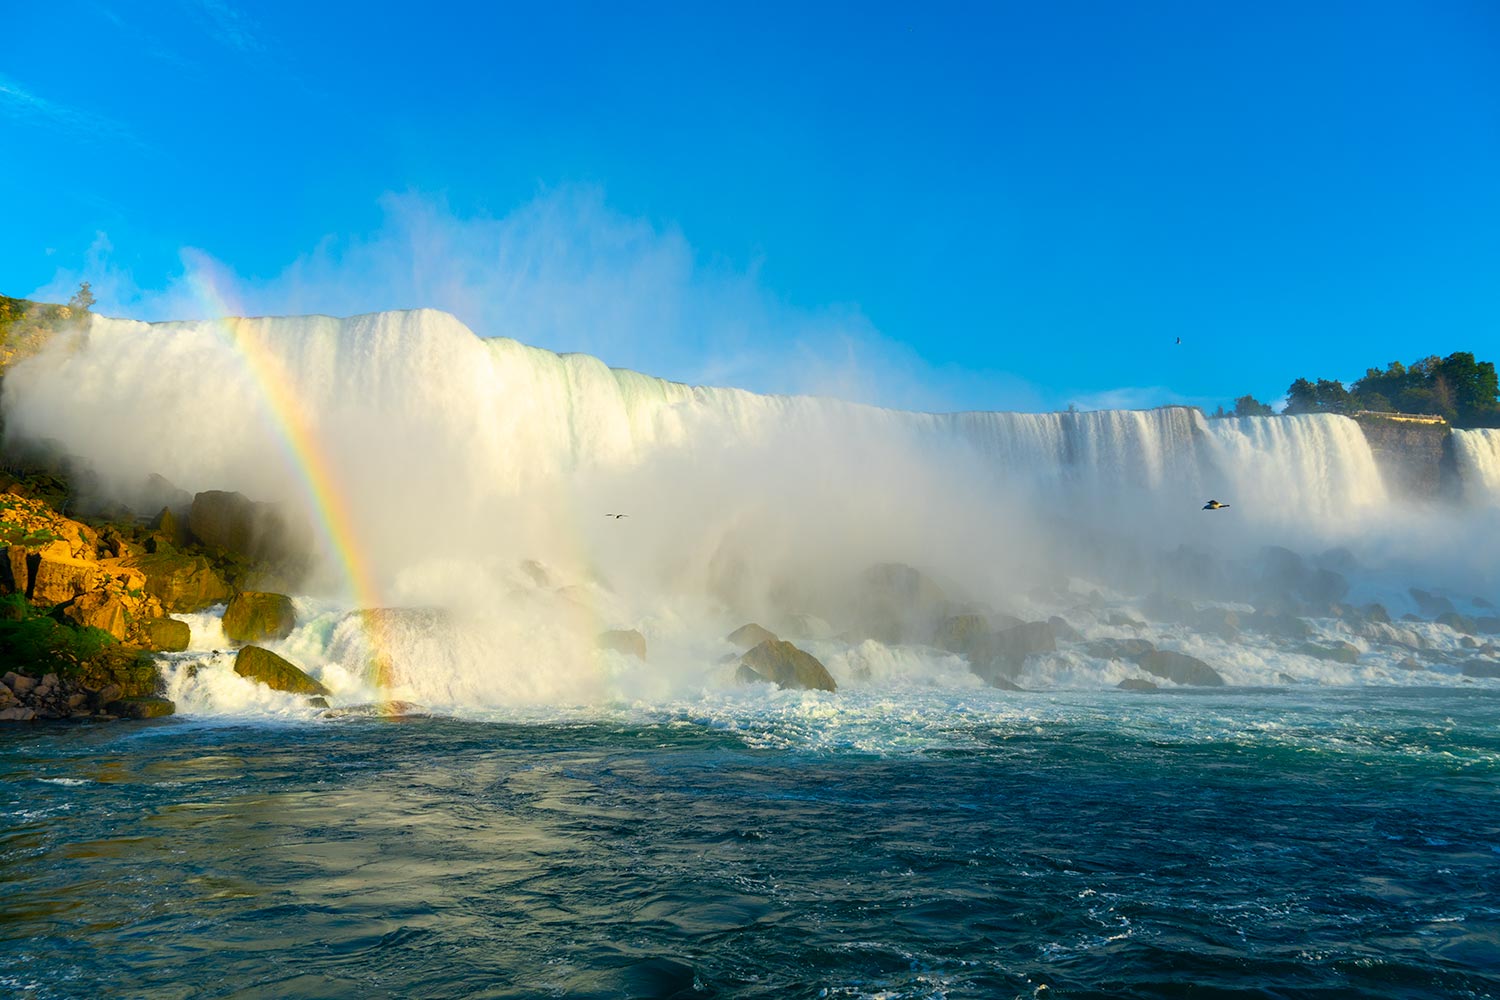
Niagara Falls—one of the most picturesque marvels of nature in Canada—is a photographer’s dream. Since you can walk behind it, boat into it, and look over it at various elevations, you can photograph it from behind, ground level, the front, or above.
Best of all, the Niagara Falls Lightshow is one of the most photogenic events anywhere. At night, hundreds of LED lights create a breathtaking and beautiful display of Niagara Falls.
In this guide, I will show you how to take the best photos of Niagara Falls.
For more information on how to explore the Niagara Falls region, refer to the Niagara Falls Adventure Guide for a more comprehensive guide.
Camera Equipment
While phone cameras are excellent in most circumstances, they fail quite spectacularly in low light settings (the main focus of this guide). Therefore, you will need a dedicated camera—one capable of tweaking parameters such as iso, aperture, and shutter speed.
Since we will lower the shutter speed, a tripod is also mandatory, because it is impossible to physically hold a camera perfectly still while the shutter takes its time.
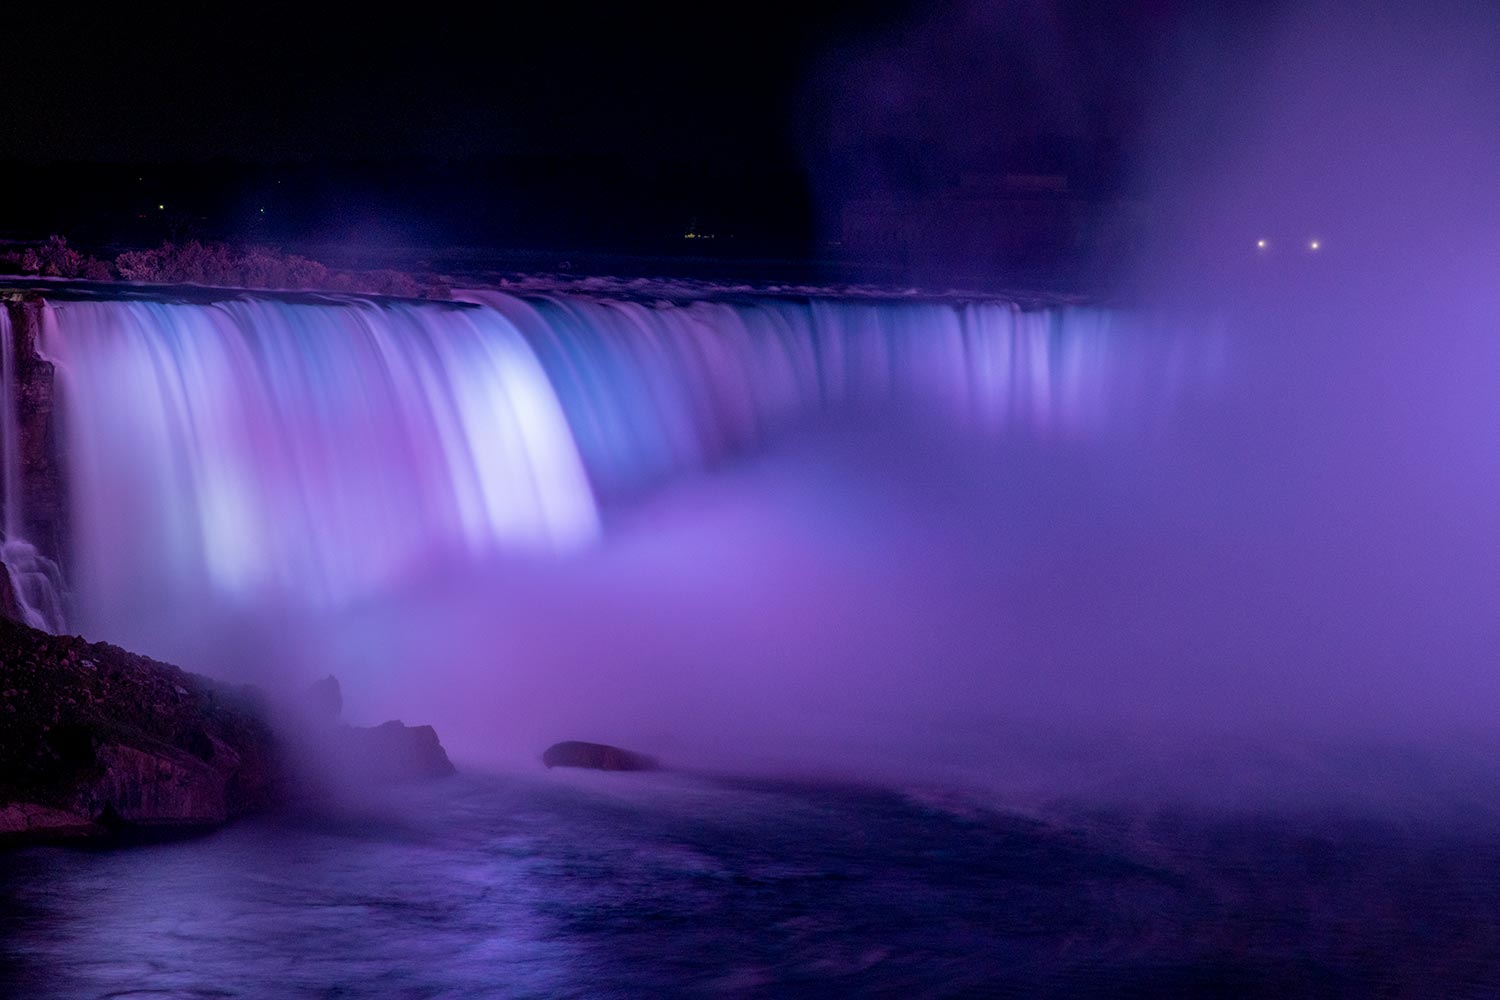
Fast vs. Slow
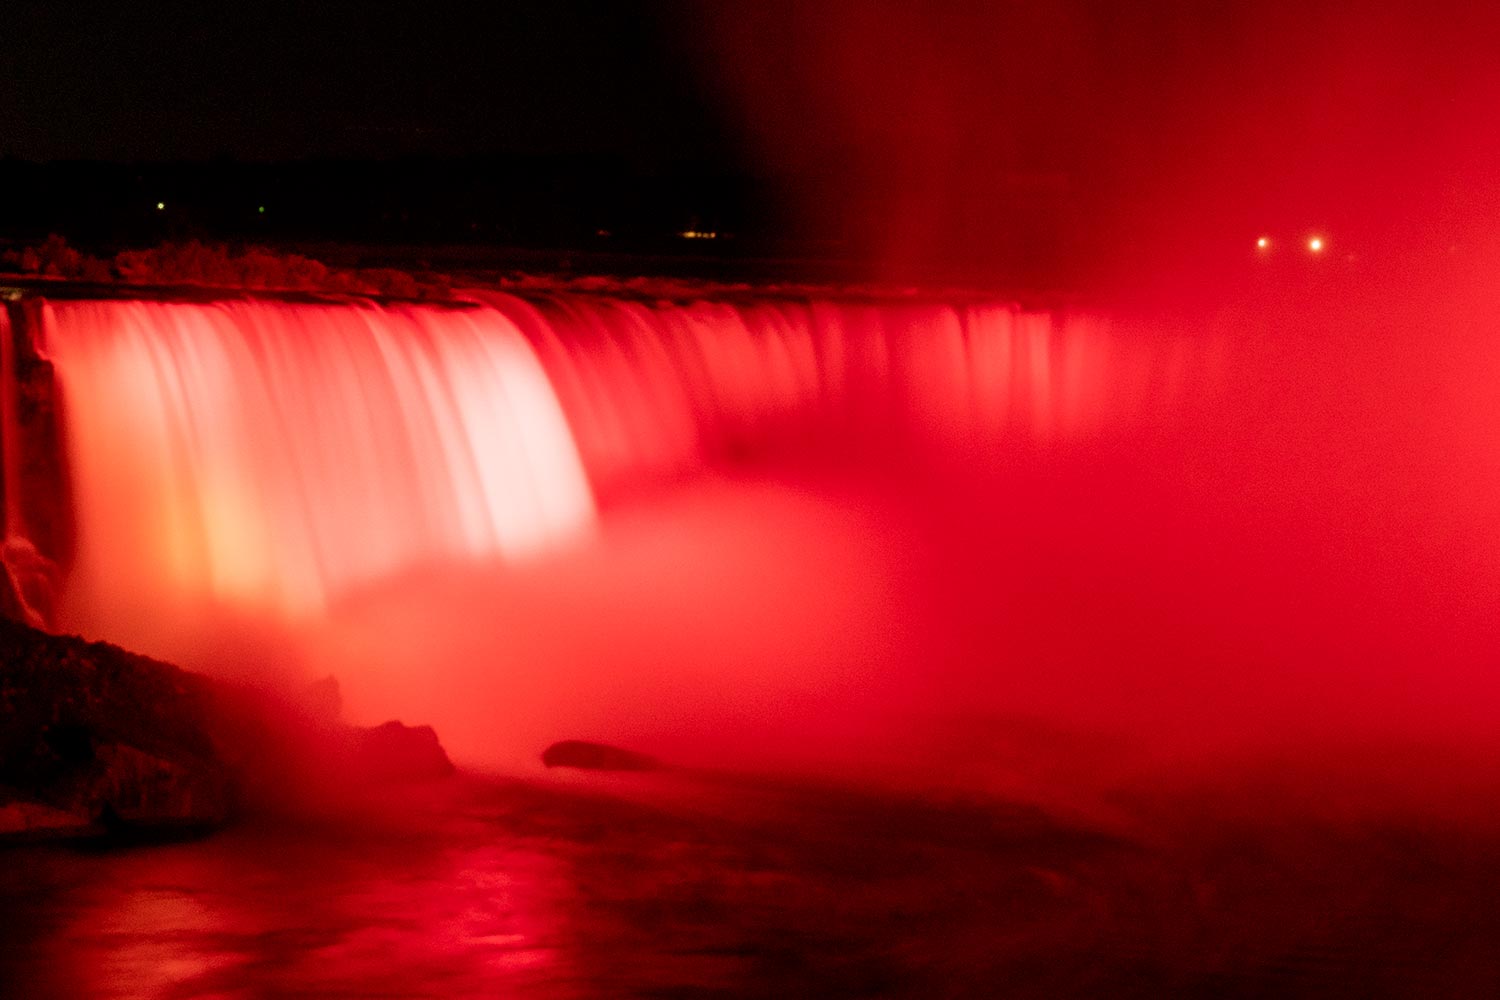
Night photography, like a few other areas in life 😉, really shines when things are just a little bit slower.
While a lovely sight to behold in person, a basic photo of Niagara Falls at night is relatively uninspiring.
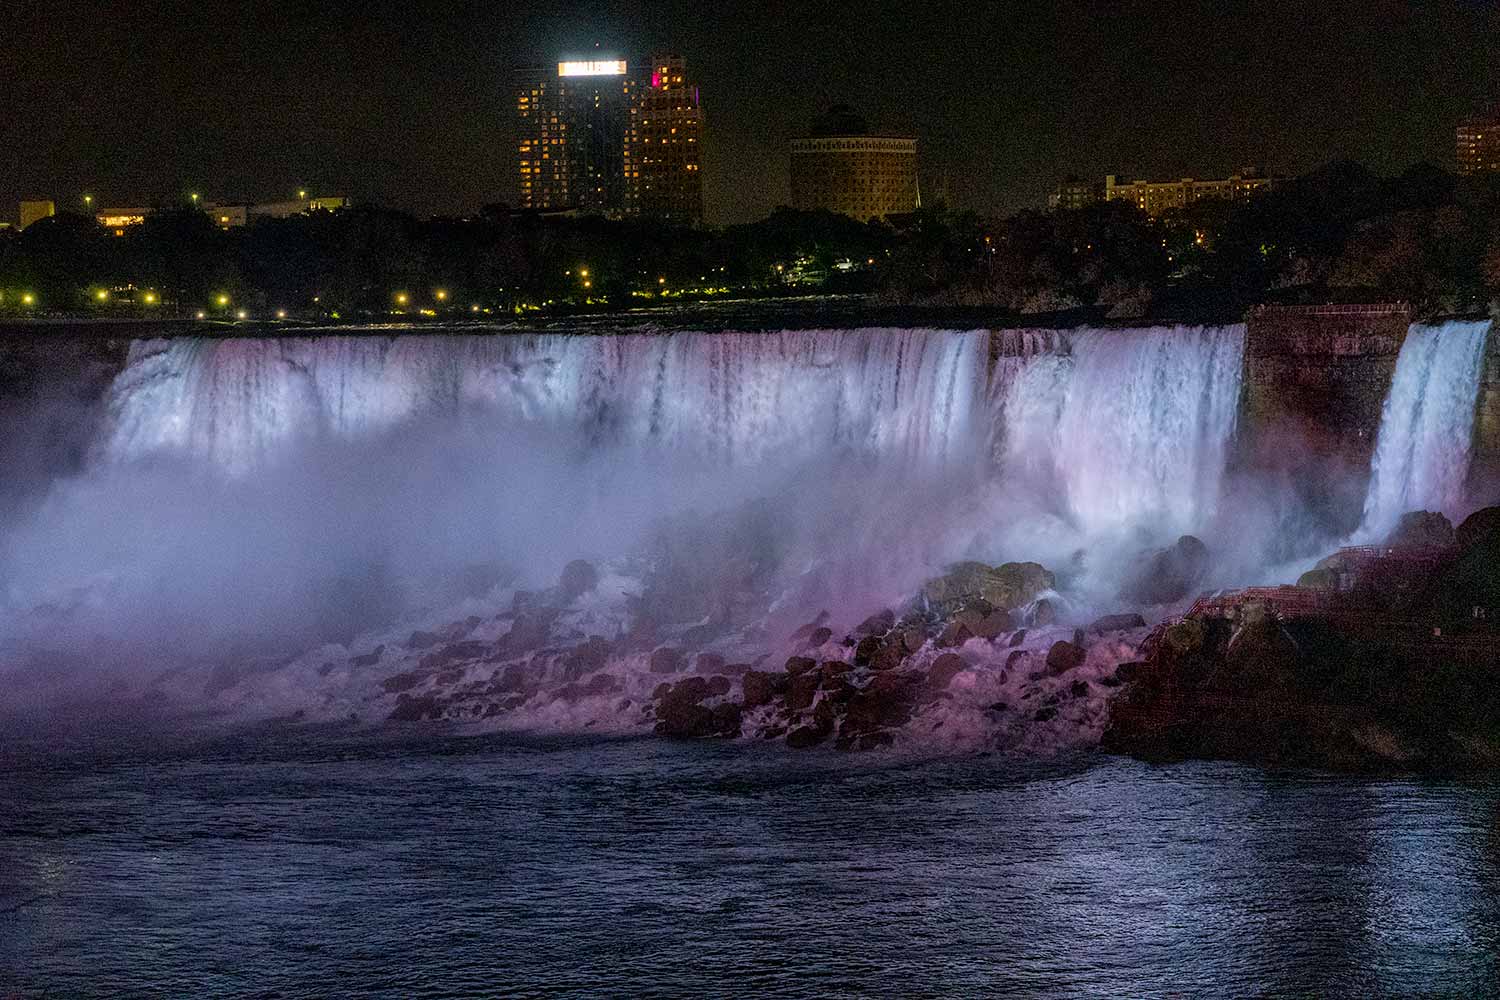
However, with the proper settings, we can have a more smooth, bright, and artistic photo.
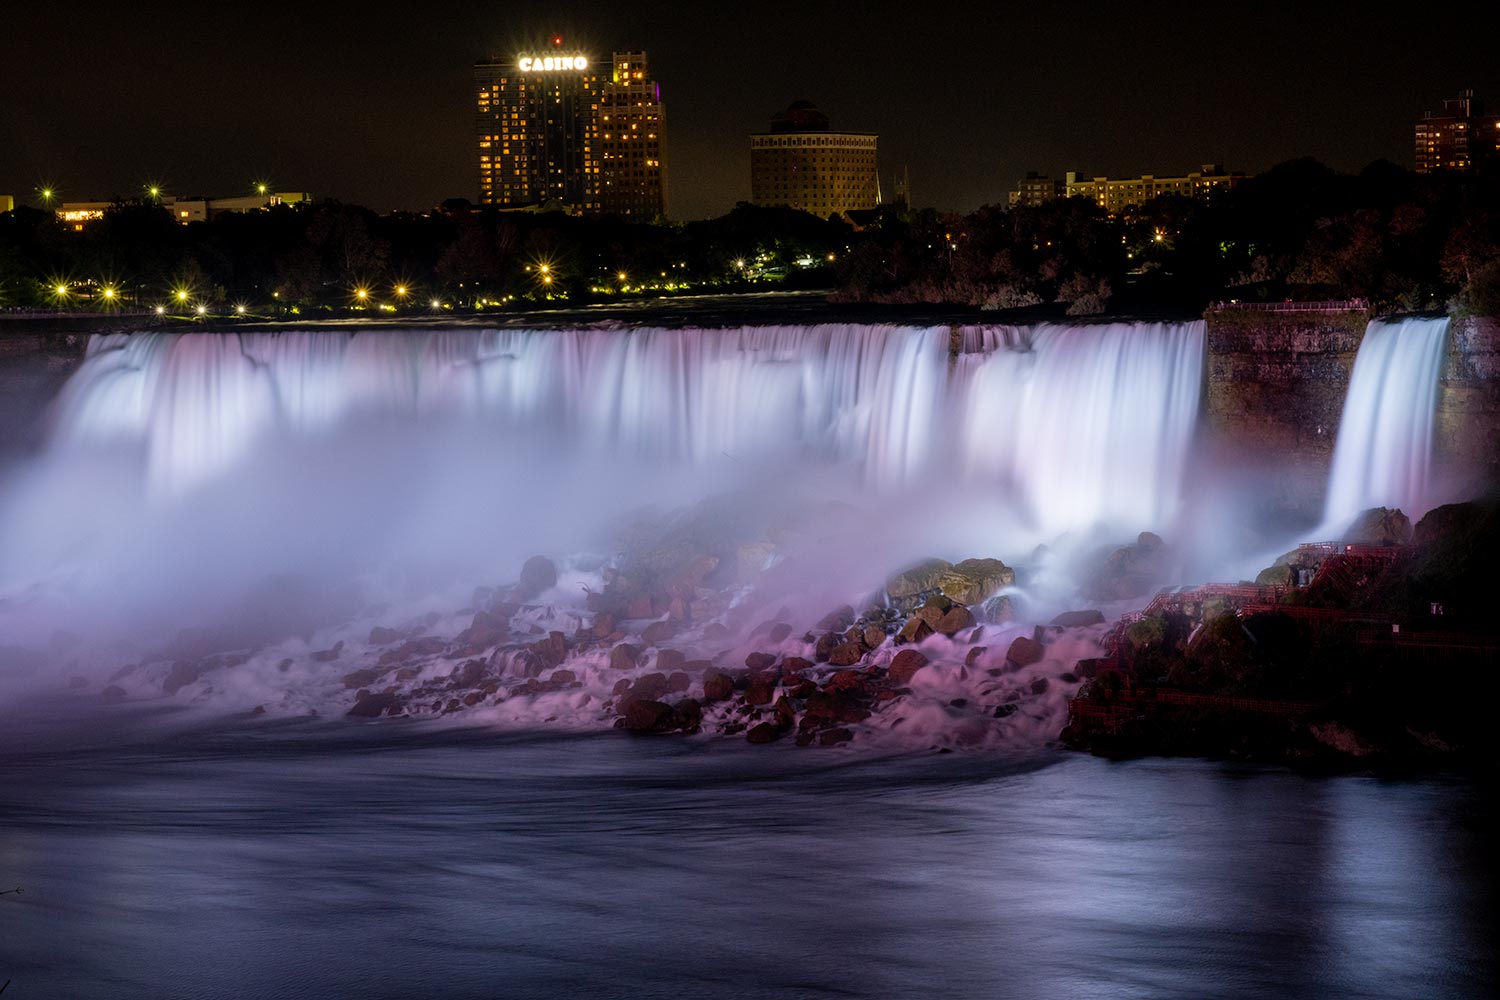
Note that the smoother-looking photo is NOT edited. Its appearance is due to the camera settings.
Settings and Tips
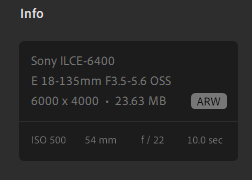
I was able to take the photos using a Sony Alpha 6400 camera, an 18-135mm kit lens, and a tripod. I’ve included the camera settings and I will cover them in detail.
Once again, to take the best photos possible at night, you will need a decent camera. It need not be too expensive, but you should be able to manually adjust ISO, Aperture, and Shutter Speed. It would also be ideal if your lens is capable of optical zoom.
File Format: RAW + JPEG is the way to go if you have a lot of storage space. Not everyone has software that can process RAW files. If you want to share your photos, then your RAW photos will be useless to most people. Furthermore, the JPEG photos might turn out exactly as desired without further need for edits. Note: Depending on your camera, the RAW file can be named something else (ARW, CRW, etc.).
Focal Length: For the photos, my focal length was 54 – 70 mm, meaning that I only zoomed slightly into the falls. The focal length is basically a measure of how much you are zooming.
Iso: 100 – 1000. Iso is the setting that controls the camera’s sensitivity to light. The lower the iso, the finer the image will be. The higher the iso, the more grainy the image will be. Try to keep the iso as low as possible for a finer image. I set my ISO to 500.
Aperture: f/22 (i.e. a very small opening). Aperture is basically the lens opening. A wider opening means more light will be captured, and a smaller opening means less light will be captured. Although light is incredibly important (especially at night), you sometimes want the lens opening to be smaller if the shutter speed will be slow enough to sufficiently capture the necessary amount of light. Since Niagara Falls will be lit up during the light show, you will have a decent amount of light to work with.
Shutter speed: 10 seconds. Shutter speed is the time in which the sensor will be exposed. For our desired photo, shutter speed is the main setting as the camera continues to take in data while the water is flowing. A shutter speed of 10 seconds will capture enough light while allowing enough time for the water to simply cascade and form a smooth-flowing effect. Without a slow shutter speed, you will not be able to capture the smooth-flowing effect.
Taking the Photo: When it comes to night photography, not using the timer is one of the biggest mistakes you can make. For example, if you press the button to start the image capturing process, then you risk slightly moving your camera for a fraction of a second (as you press and release the button). Since the shutter speed is slower, the camera might pick up this movement, potentially distorting the image and preventing it from reaching maximum quality.
To solve this problem, simply set the timer to take the photo after a couple of seconds. Once you press the button, the timer will start. Removing your finger causes no complications because the image capturing process will not begin until several seconds later. By then, the camera would have already stabilized, and your image will be at maximum quality.
Even after taking excellent photos of Niagara Falls, these basic photography concepts will help you maximize the quality of many photos in the future. It is also important to remember that, while phone cameras are quite sufficient in most scenarios, dedicated cameras really shine during low light settings.
Thank you for taking the time to read this. Like what you read? Subscribe to keep up with the best content!
Related Content
 © Copyright - Ace Adventurer
https://www.aceadventurer.com/wp-content/uploads/2020/02/Ace-at-the-Montreal-Safari-Zone-Montreal-Canada.jpg
1000
1500
Ace
https://www.aceadventurer.com/wp-content/uploads/2019/07/Sigma-Wolf-Logo-e1563487157643.png
Ace2020-02-12 12:00:152020-03-05 17:01:47Catching Pokémon at the Montreal Safari Zone
© Copyright - Ace Adventurer
https://www.aceadventurer.com/wp-content/uploads/2020/02/Ace-at-the-Montreal-Safari-Zone-Montreal-Canada.jpg
1000
1500
Ace
https://www.aceadventurer.com/wp-content/uploads/2019/07/Sigma-Wolf-Logo-e1563487157643.png
Ace2020-02-12 12:00:152020-03-05 17:01:47Catching Pokémon at the Montreal Safari Zone © Copyright - Ace Adventurer
https://www.aceadventurer.com/wp-content/uploads/2020/02/Lake-of-Legend-Panorama-Montreal-Botanical-Garden-Montreal-Canada.jpg
837
1500
Ace
https://www.aceadventurer.com/wp-content/uploads/2019/07/Sigma-Wolf-Logo-e1563487157643.png
Ace2020-02-10 12:00:042020-10-19 11:27:07A Guide to the Montreal Botanical Garden: Things to See and Do
© Copyright - Ace Adventurer
https://www.aceadventurer.com/wp-content/uploads/2020/02/Lake-of-Legend-Panorama-Montreal-Botanical-Garden-Montreal-Canada.jpg
837
1500
Ace
https://www.aceadventurer.com/wp-content/uploads/2019/07/Sigma-Wolf-Logo-e1563487157643.png
Ace2020-02-10 12:00:042020-10-19 11:27:07A Guide to the Montreal Botanical Garden: Things to See and Do © Copyright - Ace Adventurer
https://www.aceadventurer.com/wp-content/uploads/2020/02/Saint-Josephs-Oratory-Montreal-Canada.jpg
1000
1500
Ace
https://www.aceadventurer.com/wp-content/uploads/2019/07/Sigma-Wolf-Logo-e1563487157643.png
Ace2020-02-06 12:00:042021-02-16 09:48:05A Guide to Saint Joseph’s Oratory: Things to See and Do
© Copyright - Ace Adventurer
https://www.aceadventurer.com/wp-content/uploads/2020/02/Saint-Josephs-Oratory-Montreal-Canada.jpg
1000
1500
Ace
https://www.aceadventurer.com/wp-content/uploads/2019/07/Sigma-Wolf-Logo-e1563487157643.png
Ace2020-02-06 12:00:042021-02-16 09:48:05A Guide to Saint Joseph’s Oratory: Things to See and Do © Copyright - Ace Adventurer
https://www.aceadventurer.com/wp-content/uploads/2020/02/Notre-Dame-Basilica-of-Montreal-Montreal-Canada.jpg
1000
1500
Ace
https://www.aceadventurer.com/wp-content/uploads/2019/07/Sigma-Wolf-Logo-e1563487157643.png
Ace2020-02-04 12:00:542020-10-14 09:38:24A Guide to Notre-Dame Basilica of Montreal: Things to See and Do
© Copyright - Ace Adventurer
https://www.aceadventurer.com/wp-content/uploads/2020/02/Notre-Dame-Basilica-of-Montreal-Montreal-Canada.jpg
1000
1500
Ace
https://www.aceadventurer.com/wp-content/uploads/2019/07/Sigma-Wolf-Logo-e1563487157643.png
Ace2020-02-04 12:00:542020-10-14 09:38:24A Guide to Notre-Dame Basilica of Montreal: Things to See and Do © Copyright - Ace Adventurer
 © Copyright - Ace Adventurer
Holy shiiiit! These photos are amazing, and I didn’t even think about that timer thing you mentioned. It’s GENIUS! Everything makes so much sense, all this time I’m wondering how come my photos keep turning out kinda blurry even with a tripod. You are absolutly right. Even that quarter of a second vibration is enough to distort the image sometimes. Major props for the excellent advice dudee!